
why backstage?
Not every one is oriented in 3D animation terminolgy. I would like to describe here at least basic terms of preparation and
realization of 3D character animation. I guess it is beneficial even for customer to know background of making. He can get
general idea about my workflow and can understand particular terms in calculation.
And he can better imagine amount of work which is behind a final animation.
Design
Ideally customer has design of character at the start. If not, it
is necessary to propound at least basic requierement for
character. Sexuality, age, mood, final impression of character -
footstones for next job.
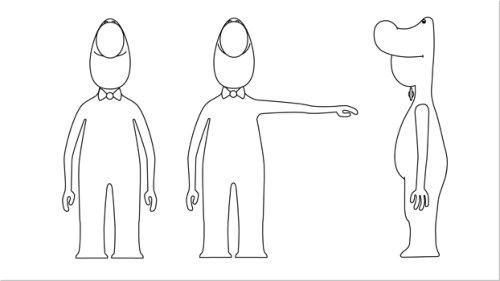
Clear drawing - simplification
To make model is necessary to change design into the single
drawing - outline.
During this process was started to get statement of the
character into the hand, what is more important for latest
realisation.
Generaly is good to get familiarized with that character as soon
as possible because of later animation when we should to think
as that character.
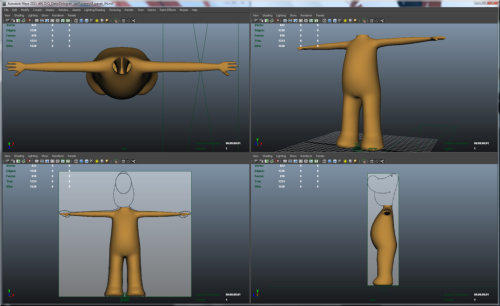
Making of 3D model - body
On the basis of drawing the model is made.
?(The model is made on the basis of drawing.)?
It is started with body without head. Although the body is
stylized, it should folow some anatomics rules
It is necessary to keep on the model good topology to precede
relevant complication during animation or during texturing it
means UV maps making.
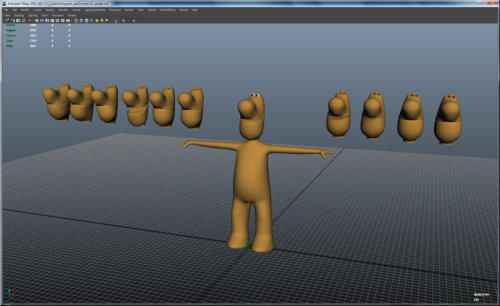
Making of 3D model - head and emotional blendshapes
It is the most challenging part of modeling. The head establishes
what empathy or antipathy we will get to that character.
From final stage of the head are made blendshapes. They are
stage of face during various emtionals and they are something
like stock or mixer connected with basic head, where is possible
to combine these stages in various ways and animate them.
UV maps and texturing
When the model is finished, it is necessary to make UV maps. 3D
model is unwrapped into the 2D shape in the special editor where
every point from 3D space has unique position in the square
determinated by axes U-V. A generated mesh is than aligned to
the regular shape by various repetitive steps. This mesh is
exported to common paint editor like Photoshop where a needed
texture is drawn by pen sensitive tablet. Finally, the texture is
imported back to the 3D scene where it is assigned as a material
to our model.
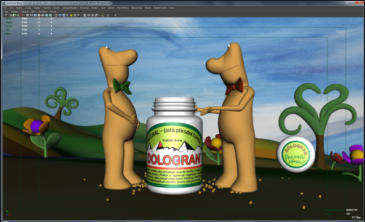
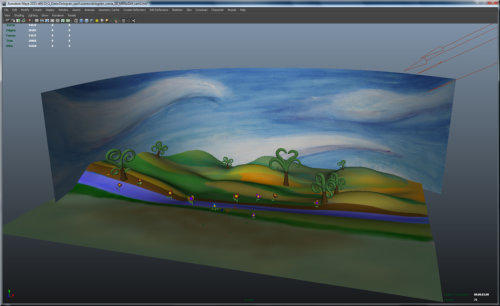
Scene creation
The scene is made in the same way as the character. It means at
first 3D models are created for which UV maps and textures are
made and applied to.
Next step is preparation of lights and cameras. Based on the
scene, available time or budget it is necessary to decide whether
to use lights in classical way and use Maya software render or to
use Global Illumination, resp. Final Gather and use Mental ray for
rendering. It is decision between time and quality.
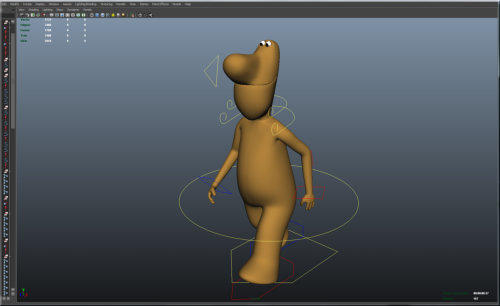
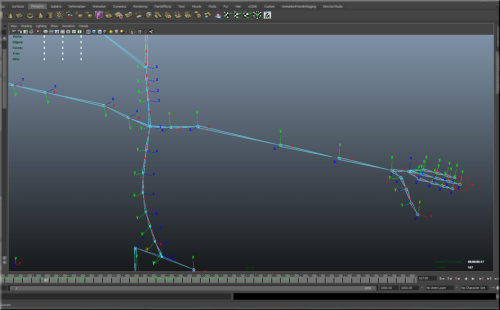
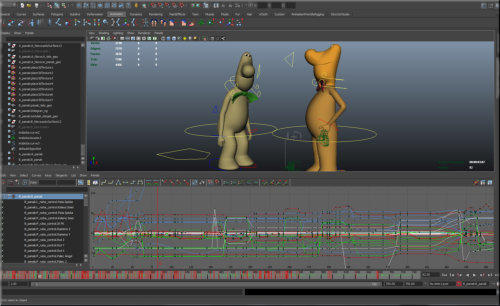
Making of skeleton - riging
Besides the model we need a functional skeleton system to
control our character. The various orientation systems are
assigned to bones. It is necessary to look about correct alignment
of local axes. Negligence in this phase could make thing more
difficult later on.
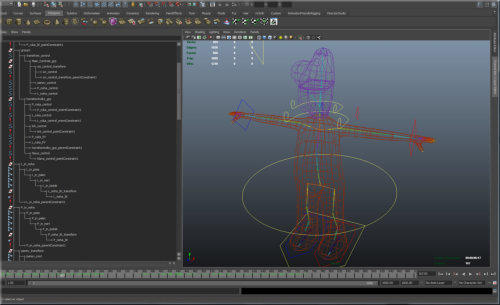
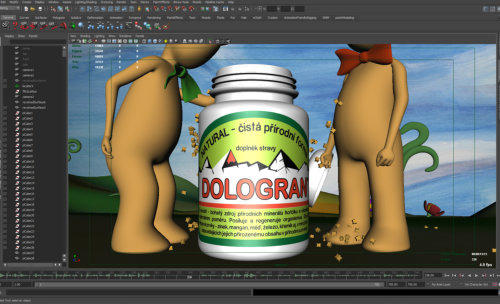
Making of controller for skeleton control
As soon as skeleton is finished it is necessary to prepare
controllers which are simple graphic objects to which functions for
driving character‘s “muscles” are assigned. For example,
controller for bending fingers, wrist rotation or shoulder motion
are placed on the wrist. With that controller you can manipulate
with the whole arm. General rule is to not touch the bones and
use remote control only.
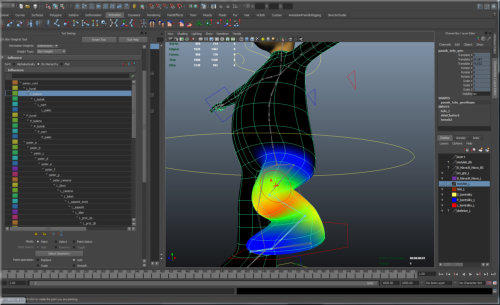
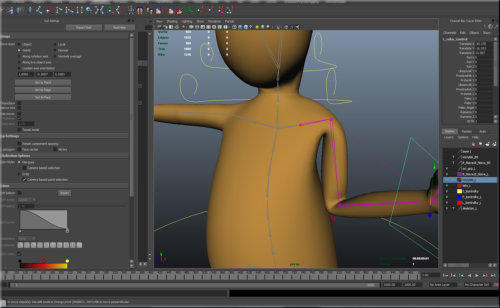
Conection of body with skeleton - binding
We have prepared body (model) and skeleton with controllers and
now we need to bind them together and weight the bones. If not
done properly, for example, moving an elbow can cause also
deformation of other parts of the body or bending a limb could
cause a nip in the place of the joint.
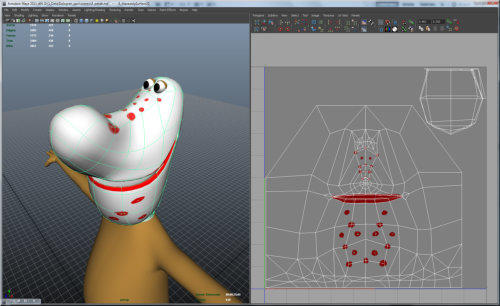
Checking of bone´s influence - weight maps
Every bone influnces its surrounding. Basic range of influence is
setup before binding. It is neccessary to adjust the influence after
binding is applied. Usage of pen sensitive tablet is recommended
for this task. Color map shows the influnce of particular bone in
given area and we can ensure by painting that bone doesn‘t
deform other parts of the body in various position. The body is
set to extreme positions during a control to eliminate casual
mistakes.
Bingo - it can walks :-)
Previous activities are challenging for patience. We are awarded
by a model which we can learn to walk, it is able to make knee-
band, turn over, blink, work with fingers. Just as a puppet.
Animation
We have the functional puppet, the scene, the script - in ideal
case storyboard or animatic. Based on that the final spot will be
cretaed. Every change of given object in time is recorded by key
frames. Relation between the frames is shown by curves in the
graphic editor. The curve in every key frame determines a
behaviour of given object in given time - speed of change,
continuity of action, easy in, easy out. It is called timing.
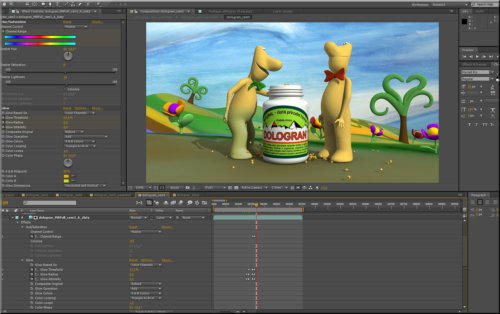
Postproduction
It is not necessary not even suitable to do whole work in 3D. It
isn’t just because of indolence but to be able to make eventual
changes. That‘s why rendering is made in layers or we can create
masks to isolate a given object in composition software in order
to make a color correction without necessity to do a new render.
We will appreciate it in case of complicated projects or under time
pressure.
The following stages of postproduction are editing, linkage to a
sound and creation of final format according to customer needs.
Simulation, dynamic
The specific chapter in animation is creation of special effects. We
want granules to fall from hand and to collide with the body,
caddy and floor. To animate them it would take too long. Faster
way it is to make a system where objects know about themselves
and they are able to crash and bounce each other. When the final
simulation meets our expectation, the simulation is “baked” – it is
converted frame by frame into the animation. After that step the
dynamic isn’t editable but all operations are faster.
Simulation, dynamic, particle system
In case of simulation of liquid or natural effects like rain it is
necessary to use more powerfull tool - particle systems. It is
closed world where thousands of particles with predefined
relations are genenerated in time and these particles are
influenced by other relations like gravity, turbulence, external
force or they can affect each other. The final appearance of the
particles can be liquid, steam, smoke, dust, pyroeffect, sand etc.
These effects are very computation extensive but it is impossible
to substitute them other way.


Rendering
All what we made exists just as a scene in our file on hard drive.
By rendering process we will transform data from computer
memory to data usable for post production or for creating a final
video. Rendering is necessary but time very consuming process.
Based on scene complexity it can take hours, days or even
weeks. During this time computer is utilized at 100 % and cannot
be used for other work (maybe except e-mails).

Control previewes, hardware rendering
A communication with customer is another important part of the
process. This is only way to prevent misunderstanding and later
re-work. The fastest way to show animation is hardware render
which is calculated directly from active view of scene without
accent on quality of materials, textures, shadows etc. This
calculation takes just few minutes or seconds. By choosing an
appropriate format we can send this preview immediately by
skype or upload through wetransfer or send via email (shown
example in wmv format is just 4,3 MB in HD resolution and
calculation took 30 sec). Click to the window - activ preview.
Click to the window - activ preview